Documentation
Tutorials
How to do Splashes
Splashes simulate water drops that splash (upwards) after hitting a (nearly) horizontal surface. This is easily visible on many buildings. Effects from splashes start very early, even when a building is just a few weeks old. Like rain drops that hit the ground (earth/sand) and add this to a wall.
Step by Step
1. Copies of the tutorial model are available.
For RichDirt V-Ray click here
and for RichDirt mental ray click here.
For Max 2016,15,14,13,12,11 use V-Ray here
and mental ray here.
The "old" versions will show warnings for a missing texture and missing dll, press open and continue for these warnings.
The model will load.

Expert user can skip steps 2 to 6 (the first 6 steps are shared among tutorials).
2. Open the Compact Material Editor. Create a new Multi/Sub Object material. Name this ´myMultiSub´.
3. Create a new mental ray Arch and Design material or V-Ray material. Name this ´myWallMtl´.
4. Open ´myMultiSub´ material again. Add ´myWallMtl´ to slots 2,3,4,5 of myMultiSub. Make sure to use -instances- (not copy, we want the same wall material used 4 times). See the ´Natural Variations´ tutorial for a snapshot of the UI. Also copy material ´mirror´to slot 6 - this is used for the windows.
5. Now go back to ´myWallMtl´. Click the diffuse color map button, to add a RichDirt texture. RichDirt is found in the standard map section of the material and map browser. Name the texture ´WallDirt´.
6. Make the Dirt color -blue- and do a short test rendering.
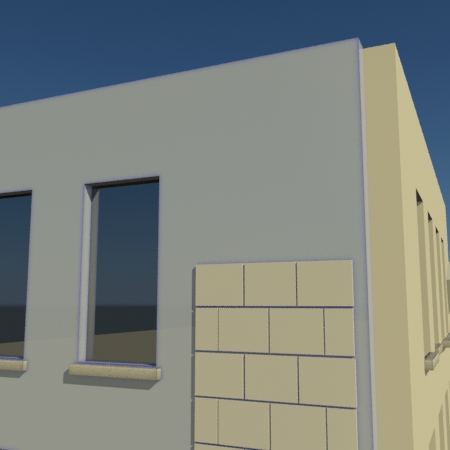
Select the wall geometry in the viewport. In the material editor press the ´Assign Material to Selection´ button.
If everything worked fine you should see some blue around the windows. In version 1.06, and higher this
will be stronger than in the image below :
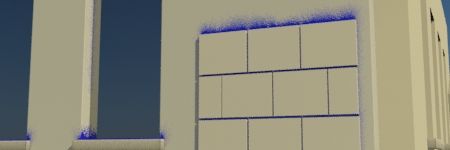
7. Now add splashes
Go back to the ´WallDirt´ texture.
Select the ´Splashes (Variations)´ preset. You find the presets in the top part of the main rollup.
Also change the ´Clean´ color to rgb 0.973, 0.871, 0.612. Now render again :

Wow ! This created natural structures in just a few seconds - at the right place !
Using the right perspective.
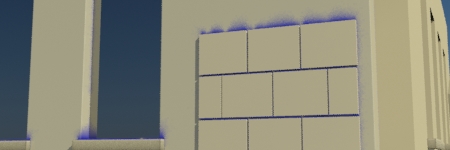
V-Ray sampling changed a lot from version 1 to 2 to version 3. Loading the model can use
old sampling, which ... you will like this ... does not look exactly as before.
The nice grain from version 1.x of V-Ray is gone. And there is an easy solution.
RichDirt 2 added the "Streak Style" rollup. Use "1" for "Breakthrough" and "4" for "Strong".
This adds 1 percent gaps and 4 percent areas that are stronger. It looks even better than in the image
above.
To get more insight a few words on the ´Splashes´ preset:
It uses a ´Bias Z´of 50 (positive) to get the AO rays directed downwards.
There is -no- IO active, as splashes in nature only happen on objects that stick out of a facade.
Ignore bump is switched on as well. Typical splash (drops) jump from an obstacle back to
the facade, and thus bumps on a facade do not matter.
Last but not least - Splashes use Streaks (AO), with a quite large noise - combined
with a very wide spread of 55 degrees. This huge spread keeps the sharp details close to
the edge, and helps to fade out into a smooth structure further away.
8. More ? Try the following 3 scenarios:
a) use a larger falloff, like 5.0. This creates more grain - well not really in V-Ray 3.x. The newer
samplers in V-Ray have fantastic strategies to avoid noise (aka grain) so you get a -longer- splash area.
b) use a larger streak Builtin size - 27.0. You find the "builtin" size in the streaks rollup.
It removes the smaller details.
For the example model this does not look like a big change. You do get impressive results
for larger edges, like an edge that is 10 meters long.
c) use a ´lower edge´ value of 5.0 (in the main rollup). This makes the splashes
even longer. Also try with "breakthrough" set to 30. Make sure size is 9, and falloff is 1.
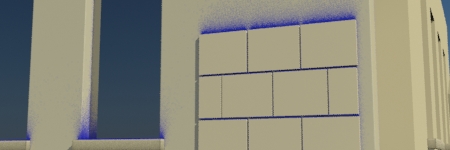
9. Splash color. The previous steps used blue, which isnt natural.
What is the ´real´ color ? It depends on what your goal is.
Sometimes splashes transport earth/sand. Then the color would be brown.
Sometimes splashes make a facade wet - then it can be green (moot) or
black (funghi). Sometimes splashes clean a facade (wash dirt away).
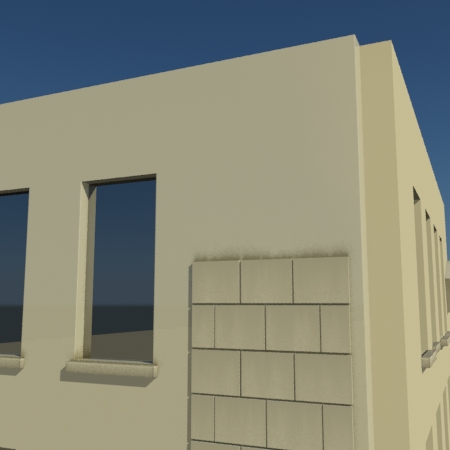
The image below simply uses a darker and more saturated color.
Changes to the tiles are a bonus.
mental images and mental ray, are registered trademarks, and are trademarks of mental images GmbH, in the U.S.A. and/or other countries. V-Ray and the V-Ray logo are registered trademarks of Chaos Software Ltd. in Bulgaria and/or other countries. Autodesk and 3ds Max are registered trademarks or trademarks of Autodesk, Inc., and/or its subsidiaries and/or affiliates in the USA and/or other countries. finalRender is a registered trademark of cebas Computer in Germany. All other brand names, product names, or trademarks belong to their respective holders.
enRichPro Copyright © All Rights Reserved