Documentation
Tutorials
How to do Rain
What is rain ? Rain in this context is the influence of rain on buildings, especially below window benches and at the (top) edge of a building. RichDirt provides 3 important functionalities:
- Dark areas below benches
- Streaks that wash away dirt below benches
- Streaks that start at the top edge


Step by Step
1. Copies of the tutorial model are available.
For RichDirt V-Ray click here and for RichDirt mental ray click here. For Max 2016,15,14,13,12,11 use V-Ray here and mental ray here. The "old" versions will show warnings for a missing texture and missing dll, press open and continue for these warnings. The model will load.
2. Open the Compact Material Editor. Create a new Multi/Sub Object material. Name this ´myMultiSub´.
3. Create a new mental ray Arch and Design material or a V-Ray material. Name this ´myWallMtl´.
4. Open ´myMultiSub´ material again. Add ´myWallMtl´ to slots 2,3,4,5 of myMultiSub. Make sure to use -instances- (not copy, we want the same wall material used 4 times). See the ´Natural Variations´ tutorial for a snapshot of the UI.
5. Now go back to ´myWallMtl´. Click the diffuse color map button, to add a RichDirt texture. RichDirt is found in the map section of the material and map browser in the standard maps. Name the texture ´WallDirt´.
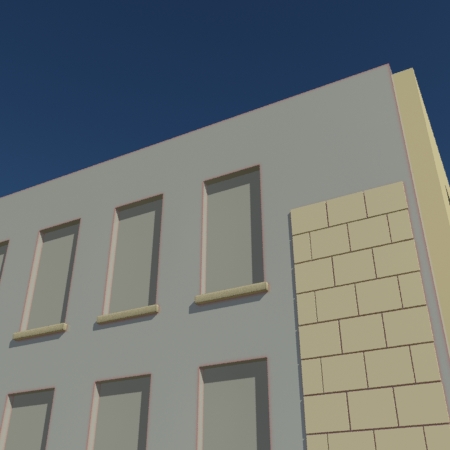
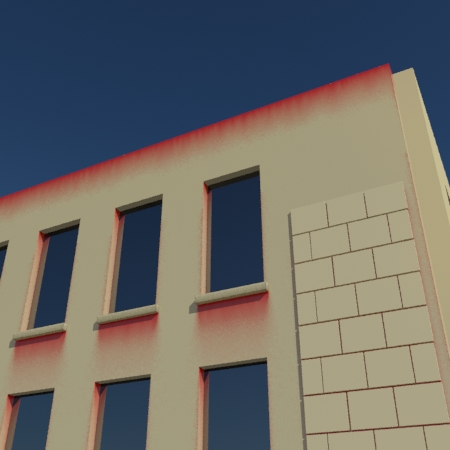
6. Make the Dirt color -red- and do a short test rendering.
Select the wall geometry in the viewport. In the material editor press the ´Assign Material to Selection´ button.
If everything worked fine you should see some red around the windows. In version 1.06, and higher this
will be stronger than in the image below :
7. Here starts the interesting part of the tutorial - Adding rain !
Go back to the ´WallDirt´ texture.
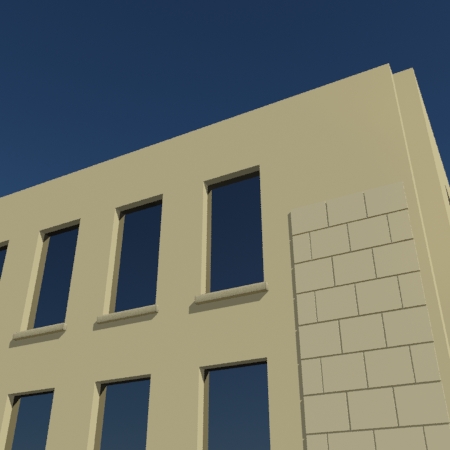
Select the ´Below Bench (Strong)´ preset.
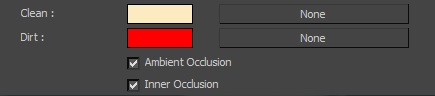
Also change the ´Clean´ color to rgb 0.973, 0.871, 0.612. Now render again :
8. Great structures ! This would take forever if done by hand. What Next ?
How to get such structures for the upper edge of the building ?.
RichDirt has 2 flags AO - (Ambient Occlusion) and IO (Inner Occlusion).
AO is for objects that stick out of a facade. Like
a window bench. The top edge does -not- stick out. So we add IO here.
Surprise ! - if you render now the streaks will be gone. Why ?
Do not forget to also enable -streaks- for IO. If this isnt active
dirt from IO will remain ´everywhere´ - dirt from IO is -added- to dirt from AO,
so if IO doesnt have streaks it will look like it ´removed´ the AO streaks.
The next image shows the streaks rollup - to enable streaks for IO.

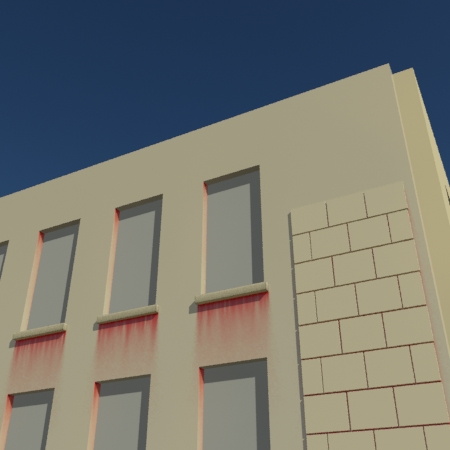
Also add the ´mirror´ material to slot 6 of ´myMultiSub´ to get nicer windows.
The geometry used for the facade uses ID 6 for the windows (by chance .. in your models
this will be different).
The image now looks like:

9. RichDirt supports many variations of dirt. Since this would be to much to show in this tutorial, just a few ideas
are mentioned. a) Modify the `Wash Length´ in the Streaks tab to get longer and shorter
streaks. b) Add your own the streak map or modify the size of the builtin to get different streaks.
c) Modify the ´spread´ to get more blurred streaks - try 15 degrees.
For fine control it is possible to mix different RichDirt with the 3ds Max composite node (see the step 13 in the ´Natural Variations´ tutorial).
As a last step in the tutorial we make the streaks less strong, like less water washing dirt away.
In the streaks rollup set ´Amount´ to 80. In the main rollup set ´spread´ to 20 degree.
This creates a natural appearance for older buildings.
If you want to use rain (streaks) in a subtle way simply use a color that
is similar to the clean color (when using bitmaps use the same bitmap a second time
with a color correction).

mental images and mental ray, are registered trademarks, and are trademarks of mental images GmbH, in the U.S.A. and/or other countries. V-Ray and the V-Ray logo are registered trademarks of Chaos Software Ltd. in Bulgaria and/or other countries. Autodesk and 3ds Max are registered trademarks or trademarks of Autodesk, Inc., and/or its subsidiaries and/or affiliates in the USA and/or other countries. finalRender is a registered trademark of cebas Computer in Germany. All other brand names, product names, or trademarks belong to their respective holders.
enRichPro Copyright © All Rights Reserved