


Probably you wanted to weather a building many times
but have you ever seriously dared to do this in top quality ?
And why did you never do that ?
Most likely because it took you too much time to add all the extra details !!
Read more !
|
|
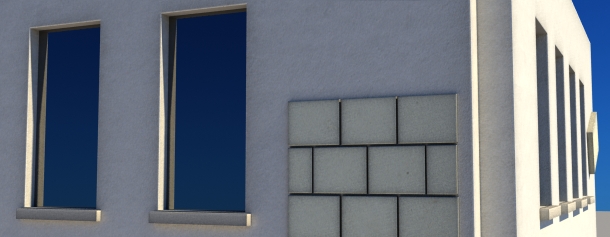
How you add streaks to concrete, tiles and stucco! |
|
|
How you weather a street block quickly! |
|
|
How you add splashes to a front easily! |
|
|
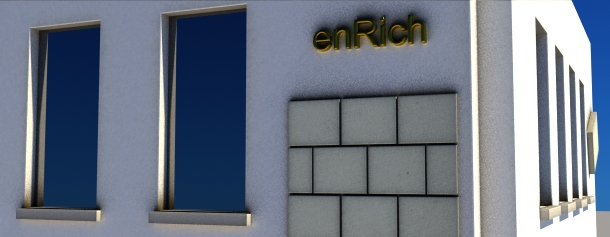
How you add natural variations across a whole building! |
|
|
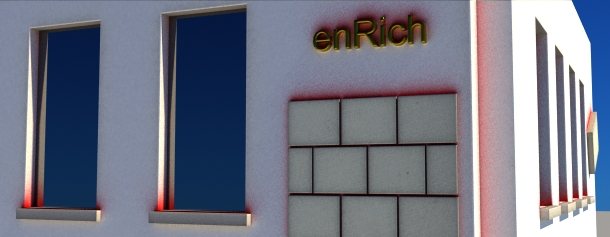
How you create impressive logos on a facade! |

Did you use concrete textures that look boring ?
Did you spend half an hour in Photoshop® to manually apply decal masks ?
Did you still get visible repetitions ?


- With RichDirt you create better concrete (and stucco, and sandstone) today.
Get excellent edges -including natural streaks - automatically. - Save 51 minutes of Photoshop® work on a 28 windows (natural stone) facade.
- Get fine streaks, or blurred streaks - just as you like - modify the ´spread´.
- Control how streaks wash away dirt with ´wash length´.
- Blend gently between streaks and general dirt, using ´amount´.
Did you have problems right now to weather a whole street block ?
Did you use low quality textures on buildings because you lack time to do better ?
Did you miss valid contact shadows around windows, benches ?
Did you need too much time to get a really good image ?
There is an easy solution !
With RichDirt you add weathering in as fast as 17 minutes for 7 buildings,
including different splashes and streaks for every building.
For ´rough´ weathering you are even faster, 8 minutes for the street block
(numbers assume modelling and basic material assignments are done before).
Why is this so much faster ?
1. With RichDirt PRESETS you add each effect in a single click.
2. Presets deliver out-of-the-box effects.
3. RichDirt doesn´t require uvs, so you save the time to tune uvs around windows, doors and benches.
4. You save time for texture painting as well - as the effects are added automatically.
See the Fast Weathering video tutorial for an example how fast you can handle a full building.
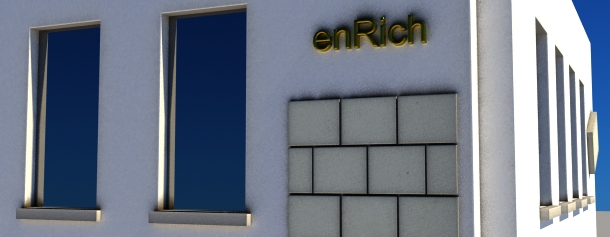
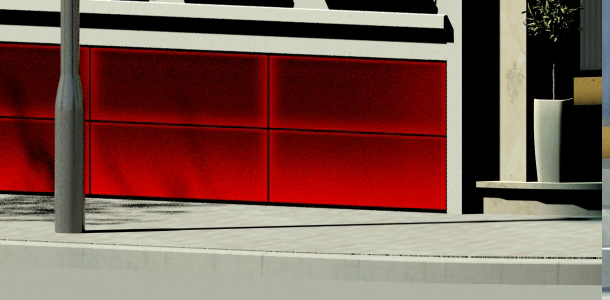
Did you ever create a Logo and then didn´t add splashes (and streaks) around it?
Sure - you won´t create a building with a Logo every day. But when you needed it - what did stop you
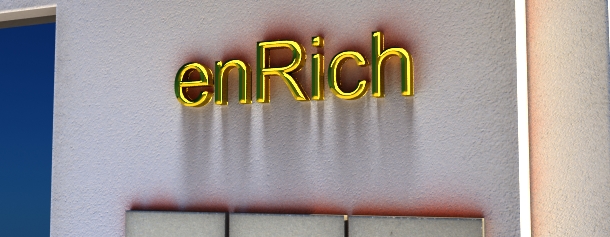
from doing it in best quality ? On a real logo water drops bounce back to the wall
- in a different way for every letter. Water flows down, and creates nice streaks below the Logo.
The last time you had such a scene - did you think "This is too much work, each letter is different, and I´d need
to paint an hour in Photoshop® to get it done"?
Did you say "Even if I had painted the splashes in Photoshop®, I'd still need
to get the texture back to 3ds Max, and I don´t want to use RTT today" ?
Or did you think "I could paint it in Photoshop®, but that texture has limited size
that will look washed out when I render in higher res" ?
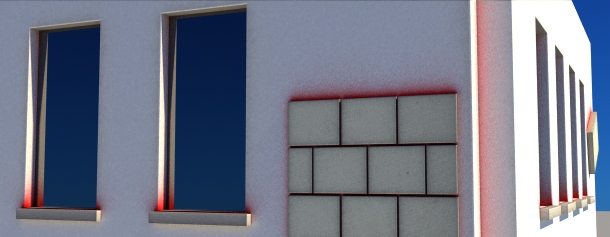
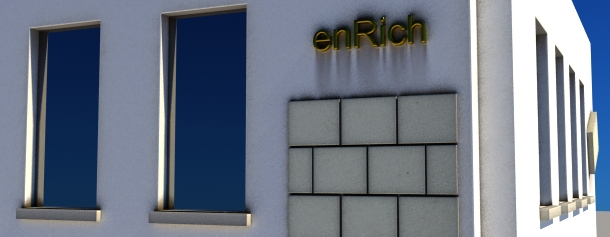
With RichDirt you easily add splashes that look natural.
You select the splashes Preset and you're done!
Even when you change image resolution (or make the Logo larger) everything -fits-.
What do you do -today- when texturing non-rectangular objects?
How do you match the corner points ?
Stretching at the price of ugly distortions ?
What do you do when the texture has an orientation (like streaks)? - cut the streaks in Photoshop®,
turn them manually, and re-add them - to match the edge?
Or is this too much work - so you don´t use a good texture?
How do you get the correct orientation on surfaces with an up slope?


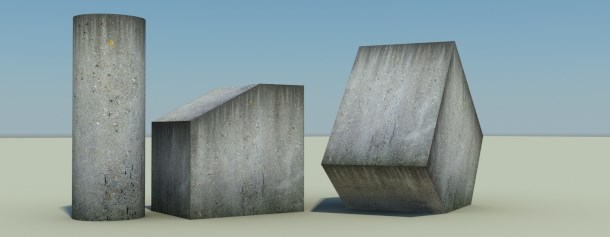
With RichDirt you get streaks at the edge, even when objects have a different shape.
The orientation is correct - automatically.
How you gain - with an Optimal User Interface
RichDirt doesn´t only provide Presets so that you get a whole effect with a single click. It also supports Tooltips for every parameter. You will find many shaders and plugins in 3ds Max that have -0- tooltips, or just for a few parameters. The benefit of tooltips is that you can focus on your work, without jumping to the documentation. This is both more efficient -and- more convenient.
Did you have problems to get realistic tiles ?
Did your tiles look monotonous ?
Would you sometimes like to have several textures (1 for each tile), but then you use a single texture
that looks the same everywhere ?
Wouldn´t it be great to get variations in tiles ?
With RichDirt it is easy for you to get
1. A plausible edge for each tile.
2. A variable thickness of edges.
3. Seperate tinting for upper and lower edge of tiles.
Furthermore RichDirt has a unique technique called ´optimize thin´ that works even with very thin tiles - no other solution will do
this for you.


Attractive pricing
The limited time offer at $29/€29 for 5 computers - this is just 5.8 $ for one computer - compare this to a license of 3ds Max (3495$) - that is 600 times more. But let´s compare apples to apples: Imagine you would hire a person that is really good in painting dirt effects. Take the image below, but at a resolution of 2000 pixels. How long will one need to paint this? 1 hour ? 4 hours ? How many projects do you do each year 5? 10? 20? And how many objects/buildings/facades do you have per project? Imagine that your ´painting guy´ did a great image - but you want it stronger/softer? Simply render several variants as Render Element and combine them as -you- like in Compositing / Post Production !
Render Nodes / Backburner
Each License of RichDirt can be used on an infinite number of Render Nodes. For example you buy 1 License. This allows to use up to 5 seats of 3ds Max. In addition you can add as many Render Nodes as you wish, your investment in extra workstations for faster rendering is fully valid. For example if you have 20 Render Nodes, all of them are included.
mental ray slaves/satellites
Enjoy free rendering with all of your slaves and satellites. Distibuted bucket rendering can be a great help when you render single images and want results faster.
Free Version Download
Use the free version for ...
The free version of RichDirt is fully working, you have unlimited access to all the functionality. All features work without a watermark up to 700 pixels, and even better all features except streaks and extreme features work without a watermark up to 30000 pixels. This means that you can create animations in video resolution 100% for free. V-Ray fans like the fast combination of inner occlusion (aka ´invert normal) and ambient occlusion - for images up to 30000 pixels. mental ray fans have inner occlusion directly available for the first time.
Use the free version to ...
Do an in-depth-test before you buy. Test how fast it is on your computer. See how it works on your models. How it works for your new project. Standard Microsoft installers assure fast and reliable installation.
Get the free version as a present!3ds Max versions: 2010, 2011, 2012. Renderers: mental ray + V-Ray.
Two ways to the download links
- Fastest - Facebook, like RichDirt, and later click here go to the Fan Page. Fans have access to the download links on Facebook.
- Classical - enter your e-mail below, get the links mailed to your mailbox.
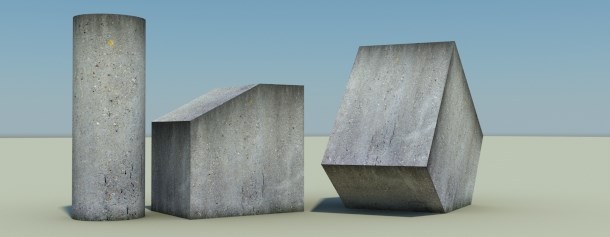
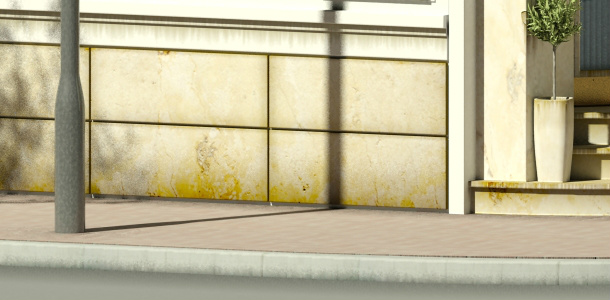
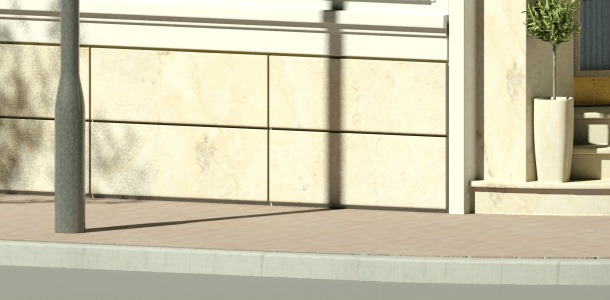
You don´t believe yet that this ´Optimize Thin´ thing really works ?
The before/after images below show you in detail what the difference is, and the text below explains why this is so important to get things done fast. The first image is rendered without the ´optimize thin´ feature of RichDirt. The second image uses ´optimize thin´. First take a look, which one do you like more? Then read more below (there is a real risk that you stop reading here, because you would miss a really important point). Move the green handle !!
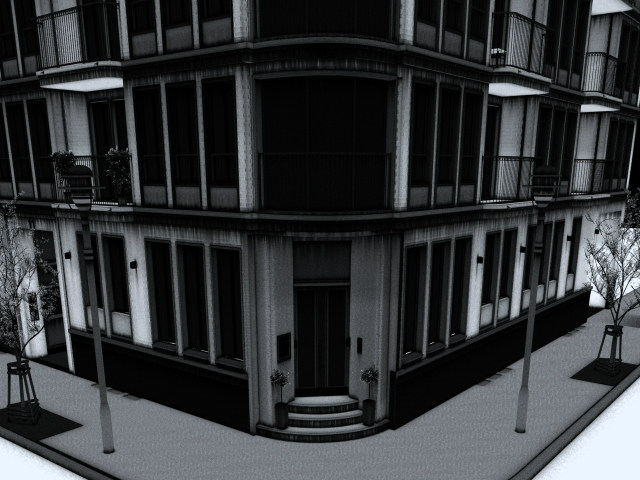
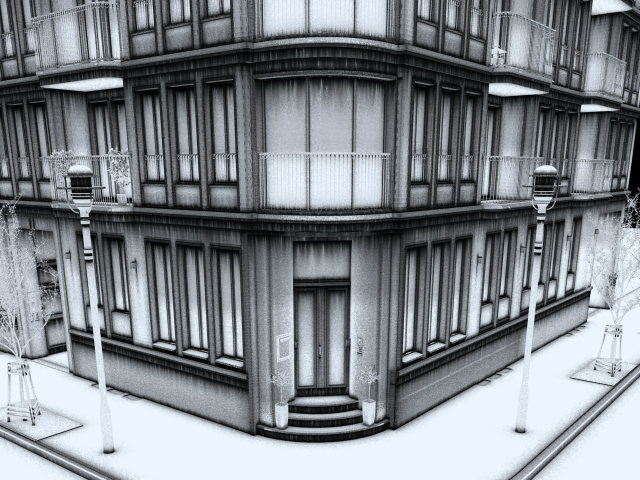
Do you prefer the ´right´ image ? Both images use the very same materials, textures, lights, geometry. 100 % identical. The model itself is a real production model made by Pixelsonic for a real project, even before RichDirt was available. I.e. this is -not- a demo model. The model´s geometry has -not- been touched for use with RichDirt. Furthermore none of the materials was touched. All rendering was done via a single ´mr Shader Element´ Render Element that uses RichDirt. Since the model was not touched, it contains original geometry, including objects that are very thin:
- All windows are thin
- The door is thin
- The wall touching the ground is thin
- The doorbell plate is thin
- The ledge is thin
Why does this create such a big benefit in time (work) ? You can use -1- single RichDirt for all of the building. You don´t have to modify geometry. You don´t have to create local materials (like an extra material for the ledges using a smaller radius to make it look good). You can even use it from another Rendering Engine in 3ds Max (like V-Ray) since it is based exclusively on Render Elements. How do you get a photoreal image then ? Use the Render Element in Autodesk Composite or Adobe Photoshop, After Effects to composite the ´Diffuse´, ´Diffuse Direct Illumination´, `Diffuse Indirect Illumination´ Render Elements. If you want to hear more - see the Fast Weathering video tutorial.
It is great to see this new innovative plug-in from a valued long term partner.
The many presets make working with it a snap for beginners. Will certainly be including this in my workflows from now on!
I´m really excited about it !
It is set to become one of my favorites which I use in my everday work flow.
I will not hesitate to add it to our architectural pipeline."
I tried it on a shot i am finaling right now ... one click to get a nice grunge/ambient occlusion map"
However, it was time consuming. Even though we use VRay at our studio, I now save a substantial amount of time in post production, especially when there's a tight deadline.
I worried my MD by showing him the muck it can produce, he was worried I was going to start making all the new building projects we do into grungy images. But it will be used gently - to great effect when modelling existing buildings, next to our new ones. The old ones can be made more dirty. I like the way I can export many layers of grime, and use them how I want in Photoshop or After Effects.
![]()
mental images and mental ray, are registered trademarks, and are trademarks of mental images GmbH, in the U.S.A. and/or other countries. Autodesk and 3ds Max are registered trademarks or trademarks of Autodesk, Inc., and/or its subsidiaries and/or affiliates in the USA and/or other countries. Adobe and Photoshop and After Effects are either registered trademarks or trademarks of Adobe Systems Incorporated in the United States and/or other countries. All other brand names, product names, or trademarks belong to their respective holders.